 Khandakar Touheed Hossain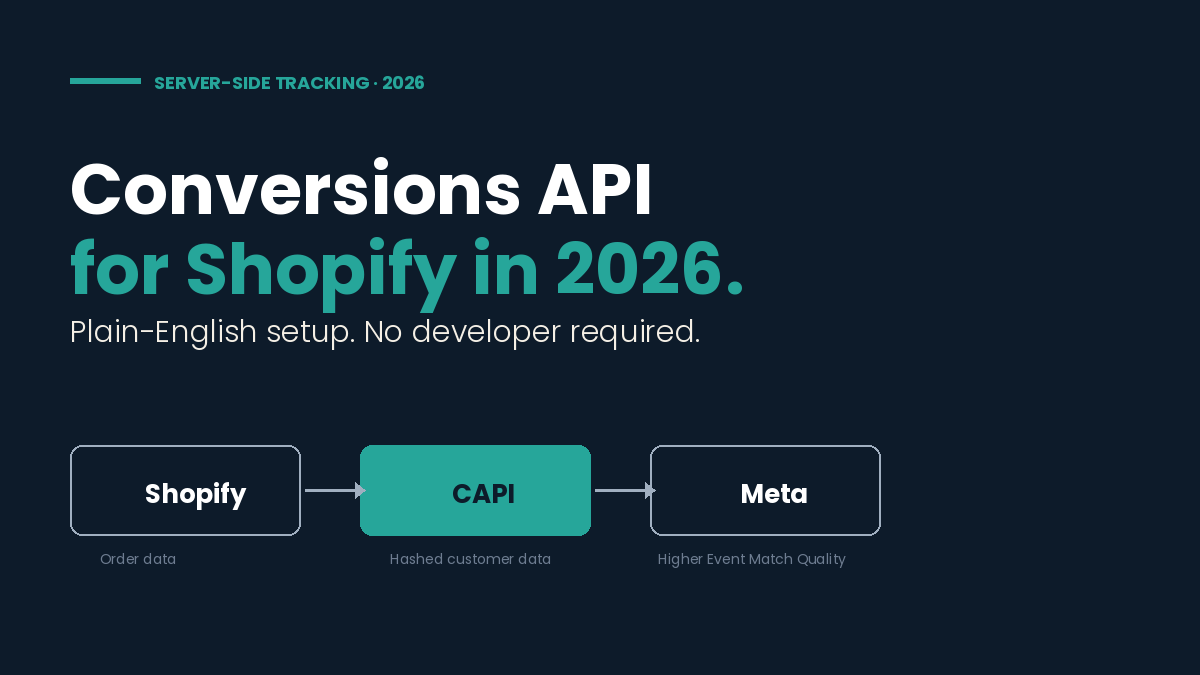
What you’ll get from this Conversions API Shopify guide
- Why pixel-only tracking now misses 25–30% of Shopify conversions in 2026.
- The 3 real ways to install Conversions API on Shopify — ranked from no-code to developer-only.
- The Event Match Quality (EMQ) number to target, and how to test your setup is firing correctly.
- The exact method I recommend for most stores, and why.
“Do I really need Conversions API Shopify setup if I already have the Pixel installed?” I get this question every week from store owners.
Short answer: in 2026, yes. Browser-side tracking now misses 25–30% of conversion events thanks to iOS privacy changes, ad blockers, Intelligent Tracking Prevention (ITP), and cookie lifespans that shrink every year. Conversions API closes that gap by sending event data server-to-server, where the browser cannot block it.
Below are the three real ways to install Conversions API Shopify integration, ranked from “anyone can do this in 15 minutes” to “you will need a developer.” I have set up all three across client stores. I will tell you which one I actually recommend at the end.
What Conversions API Shopify integration actually does — in 5 sentences
When a shopper buys on your store, the Pixel sends a Purchase event from their browser to Meta. CAPI sends the same event a second time — from your server to Meta, with hashed customer data attached. Meta matches the two events using the same event_id and counts the purchase once (no double-counting). If the browser-side event was blocked, the server-side event still arrives. Result: Meta sees the conversion, attributes it correctly, and the optimization algorithm gets a complete signal instead of a noisy one.
How to tell if your current Conversions API Shopify setup is doing its job
Open Meta Events Manager → your dataset → Overview tab. Look for two numbers:
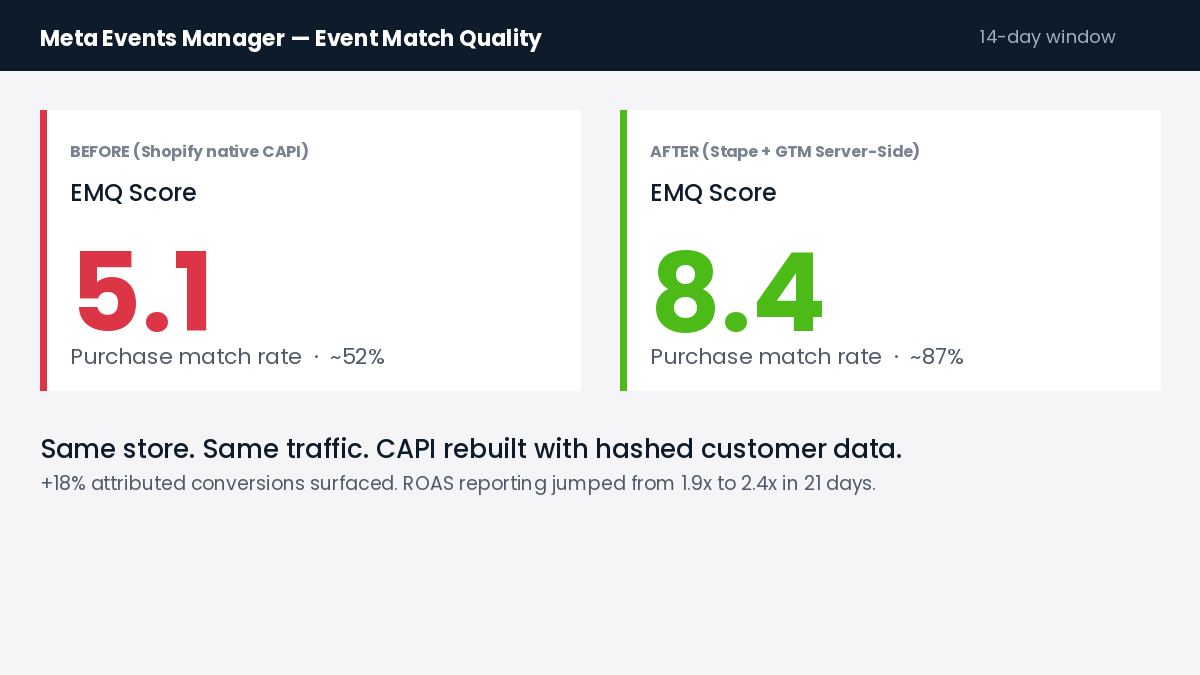
- Event Match Quality. Below 6 means Meta is matching your conversion events to actual users poorly. Aim for 8+. Above 8 typically delivers 15–25% more attributed conversions.
- CAPI Coverage %. If this is below 80% for Purchase events, your server-side setup is incomplete or duplicating instead of complementing the Pixel.
If either number is low — even if you “have CAPI installed” — your setup is not earning its keep.
Shopify’s native Meta channel
This is the path Shopify pushes you toward in setup. It installs Pixel + CAPI together through the Meta sales channel app, with zero code.
How to set it up:
- Shopify admin → Sales channels → Meta channel → Connect.
- Sign in to your Meta Business account and connect your Facebook page and Instagram account.
- Select your Meta Pixel (or create one). Shopify will automatically wire up CAPI alongside the Pixel.
- Confirm data sharing is set to Maximum (not Standard or Enhanced).
- Test by making a $1 test purchase using a discount code. Confirm Purchase event fires in Events Manager with both Browser and Server source.
GTM Server-Side + Stape (best Event Match Quality)
This is what I install on most client stores doing $20K–$500K/mo. You run Google Tag Manager Server-Side on a Stape-hosted container, and Stape’s Facebook Conversions API tag handles all the server-to-server event sending — with proper hashing, deduplication, and Event Match Quality optimization.
How to set it up:
- Create a Stape.io account ($20/mo plan is enough for stores under 1M events/month).
- In Stape, create a new GTM Server-Side container. Stape will spin up a tagging server at a custom subdomain like server.yourdomain.com.
- In Google Tag Manager (web container), install the Stape data client on your Shopify theme using their custom Shopify integration.
- In GTM Server-Side, add the Facebook Conversions API tag. Connect your Meta Pixel ID and CAPI access token (from Meta Events Manager → Settings → Conversions API).
- Map all standard ecommerce events: PageView, ViewContent, AddToCart, InitiateCheckout, Purchase. For each, send hashed email, phone, first name, last name, city, country, and external_id.
- Configure event_id deduplication so the Pixel event and the CAPI event share the same event_id (prevents Meta counting one purchase twice).
- Test with the Meta Test Events tool — every event should appear with both Browser and Server source, with Event Match Quality 8+ per event.
Most stores on Shopify’s native CAPI are leaving 18–22% of attributed conversions on the table — without realising it.
Custom API integration
You write a small Shopify app or use a serverless function (Cloudflare Workers, AWS Lambda) that listens to Shopify webhooks — orders/create, checkouts/update, cart/update — and posts those events directly to Meta’s Conversions API endpoint. This is the highest-fidelity Conversions API Shopify setup. No third-party tool sits between Shopify and Meta. You control hashing, deduplication, and every parameter. EMQ can hit 9+ if you do it right.
Which Conversions API Shopify method I actually recommend
For most readers of this post: Method 2. The native Shopify channel feels easier but leaves attribution on the table at every level. The custom API path is overkill for almost every store under $500K/mo in revenue. Stape + GTM Server-Side hits the sweet spot of “real CAPI benefit” without “you need a dev team.”
If you are still on the native channel and your Event Match Quality is below 7, switching to Stape typically lifts attributed conversions by 12–22% inside three weeks. That is real money showing up on the ROAS column — not new sales, just sales Meta was always missing. If you suspect your Meta ads have stopped converting on Shopify, this is almost always the first place to look.
5-minute Conversions API Shopify validation checklist
Run this 24 hours after installation. Anything below the threshold means the setup is incomplete.
- Events Manager → dataset Overview: EMQ ≥ 8.0
- CAPI Coverage on Purchase event: ≥ 90%
- Deduplication indicator: ≥ 95%
- Purchase events show both Browser + Server source
- Customer data fields: email, phone, first_name, last_name, city, country, external_id
If 4 of 5 pass, you are in. If only 2 of 5 pass, your CAPI is firing but the customer-data layer is incomplete — go back to your Stape (or native channel) settings and add the hashed customer parameters.
Mistakes I see most often with Conversions API Shopify setups
- Installing CAPI without deduplication — Meta counts each purchase twice, ROAS looks great for 2 weeks, then attribution mysteriously crashes when Meta’s system auto-corrects.
- Forgetting to send hashed customer data on the Purchase event. CAPI fires, but Event Match Quality stays at 4 because Meta has nothing to match against.
- Setting up Stape on a development domain and forgetting to migrate to the production subdomain. Half the events go to a dead endpoint.
- Trusting the Meta Test Events tool to validate production. Test Events shows you events as they arrive, but does not score Event Match Quality. Always check the dataset Overview tab after 24 hours of live traffic.
Frequently asked questions
Do I still need the Meta Pixel if I have Conversions API on Shopify?
Yes. Run both. The Pixel captures browser-side signals (clicks, scroll depth, time on page) that CAPI cannot, and CAPI captures the 25–30% of events the Pixel loses to ad blockers and ITP. Use event_id deduplication so Meta counts each conversion exactly once.
How long does Conversions API Shopify setup take to show ROAS lift?
Stape + GTM Server-Side rebuild typically shows a 12–22% reported ROAS lift inside 3 weeks. The lift is not new revenue — it is conversions Meta was already happening but failing to attribute. Native channel setups show a smaller lift (5–10%) because EMQ usually plateaus around 5.5–7.
Will Conversions API Shopify integration lower my CPA in Ads Manager?
Usually yes, but not by lowering ‘real’ cost. It surfaces conversions the Pixel was missing, which Meta then attributes to your campaigns. Reported CPA drops 10–25%, reported ROAS rises 12–22%. Want the full diagnostic before you blame CAPI? Read my post on what to check when Meta ads stop converting on Shopify.
How much does Stape cost for a Shopify store?
The $20/mo ‘Power Up’ plan covers most Shopify stores up to about 1M events per month. Above that, the $99/mo Business plan is usually enough. You also need a custom subdomain (already free with most domain registrars).
How do I know my Conversions API Shopify deduplication is working?
In Meta Events Manager → your dataset → Overview, the Purchase event will show a ‘Deduplication’ indicator with a percentage. Above 95% deduplicated means your Pixel and CAPI events are correctly merging into one record. Below 70% means you have either no deduplication, mismatched event_ids, or CAPI firing without a matching Pixel event.
Once your Conversions API Shopify setup is live
With EMQ at 8+ and deduplication above 95%, Meta finally sees what your store is actually doing. The next decision is what to do with the better data: scale Advantage+ Shopping, sharpen manual prospecting, or rebuild your audience structure. Read the Advantage+ vs Manual framework to know which campaign type to run on top of your new tracking foundation.
Not sure if your CAPI is actually working?
I’ll open your Events Manager, check your EMQ, deduplication and CAPI coverage, and tell you exactly what is leaking — in 20 minutes. No pitch, just numbers.